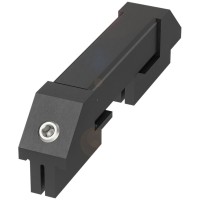
Today we're diving into a hands-on design tutorial featuring the Balluff BEN0017, a high-performance inductive proximity sensor. This component is an excellent subject for a practical tutorial because it represents a workhorse of industrial automation. Unlike a simple IC or passive component, it's a complete, self-contained sensor subsystem. Designing with it teaches crucial real-world skills: interfacing industrial-grade digital sensors with low-voltage microcontroller logic, managing different power domains, and ensuring reliable operation in electrically noisy environments. We will design a robust interface circuit that allows a 3.3V microcontroller to reliably read the BEN0017's PNP (sourcing) output in a typical 24V DC industrial setting.
Our design requirements are straightforward but must be met with precision. The Balluff BEN0017 operates on a supply voltage (VS) of 10-30V DC. It provides a PNP output, meaning when it detects a target, it sources current from VS to its signal wire. Our load is a 3.3V microcontroller's GPIO pin, which must not see a voltage above 3.6V. The core requirement is to safely translate the sensor's ~24V "ON" signal down to a clean 3.3V logic high, while providing a solid 0V logic low when the sensor is off. We also need to protect the microcontroller from voltage transients and reverse polarity, and include a visual indicator for sensor status. Key specifications to note from the BEN0017 datasheet are its maximum output current (200mA), its leakage current when off (<0.1mA), and its switching frequency.
The step-by-step design process centers on a voltage divider and protection network. First, we calculate the resistor values for the divider. With a sensor "ON" voltage (VON) of approximately 24V (VS) and a desired microcontroller voltage (VMCU) of 3.3V, we choose a standard value for the upper resistor, R1. Let's select R1 = 10kΩ. Using the divider formula VMCU = VON * (R2/(R1+R2)), we solve for R2, which yields about 1.55kΩ. We'll use the standard value of 1.5kΩ, giving us a safe VMCU of ~3.14V. Next, we must handle the sensor's "OFF" state. The small leakage current (<0.1mA) flowing through the divider could still create a voltage high enough to be read as a logic '1'. To pull the line firmly to ground when the sensor is off, we add a pull-down resistor, R3, from the microcontroller pin to ground. A value of 10kΩ is sufficient to sink the leakage current, creating a voltage well below the logic-low threshold, without loading the divider excessively when the sensor is on.
The component selection rationale builds a complete and robust Bill of Materials (BOM). For the resistors (R1=10kΩ, R2=1.5kΩ, R3=10kΩ), standard 0603 or 0805 size SMD resistors with 1% tolerance are suitable for precision and compactness. Protection is critical: a 1N4148 or similar signal diode (D1) is placed across the divider input to clamp negative voltage transients. A series resistor (R4, 100Ω) at the sensor input limits current from any positive transients. For the visual indicator, a standard 3mm green LED (LED1) with a current-limiting resistor (R5) is connected in parallel to the voltage divider input; we calculate R5 = (24V - VfLED) / ILED. For a typical green LED (Vf~2.1V) at 5mA, R5 ≈ 4.3kΩ (use 4.7kΩ). Finally, a 100nF ceramic capacitor (C1) is placed at the microcontroller pin to filter high-frequency noise.
For simulation tips, use a SPICE-based tool like LTspice. Model the BEN0017 as an ideal switch in series with a 100Ω internal resistor (to approximate its output characteristic) switching between an open circuit and a 24V source. Pay close attention to the transient response: simulate the switch closing and opening, and probe the voltage at the microcontroller pin. What to look for is a clean, rapid transition between logic levels (0V and ~3.14V) without significant ringing or overshoot. Also, simulate the "OFF" state with a 0.1mA current source to verify the voltage at the MCU pin is solidly below 0.8V (a typical logic-low threshold). This confirms your pull-down resistor is doing its job.
The prototype build and testing methodology should be methodical. First, assemble the circuit on a breadboard or protoboard, but keep lead lengths short to avoid noise pickup. Power the sensor circuit with a lab bench 24V supply and the microcontroller side with its 3.3V rail—ensure these grounds are connected. Use a multimeter to verify the voltage at the divider node is correct in both sensor states. Then, connect the signal to your microcontroller and write a simple firmware to read the pin and echo the state to a serial terminal. For dynamic testing, move a metal target in and out of the sensor's sensing range. Use an oscilloscope to monitor the signal at the microcontroller pin; this is where you'll see any real-world noise or bounce. Trigger on the rising and falling edges to check for signal integrity.
Performance verification and optimization come from the oscilloscope observations. If you see noise spikes or slow rise times, you may need to adjust your filtering capacitor C1—increase its value to 10nF or 100nF, but be aware this will slow the maximum switching frequency. If the voltage levels are marginal, fine-tune the divider resistors. The key optimization step is testing under realistic noise conditions: turn on and off a nearby motor or solenoid coil to induce electrical noise. If you experience false triggering, consider adding a small ferrite bead in series with the 24V supply line to the sensor or implementing simple software debouncing in your microcontroller code. This iterative process of measure, analyze, and tweak transforms a theoretical design into a field-ready interface for a reliable industrial component like the Balluff BEN0017.